Reloading Ammunition 101
Reloading ammunition, sometimes called hand-loading or re-manufacturing, is the act of assembling components to make your own ammunition at home. It’s an incredible way to save money as well as have a way to build better and more accurate ammunition. However, learning how to reload ammo can be a bit tricky, as well as problematic.
That’s why we created this full free Reloading Ammunition guide. It will give you the step by step process on how to reload ammo, as well as give you a list of the tools you should have for this process.
Introduction to Hand-Loading: Ammo
Reloading ammo, at an extremely basic level, involves taking a fired / used brass case, cleaning it and prepping it for loading, inserting a new primer, measuring and filling the case with the right amount and type of gunpowder, and then inserting a new bullet into the case mouth. But before we can get into reloading, let’s first explore what ammunition (ammo) is – and why we’d “remanufacture” it ourselves.
Why reload your own ammo?
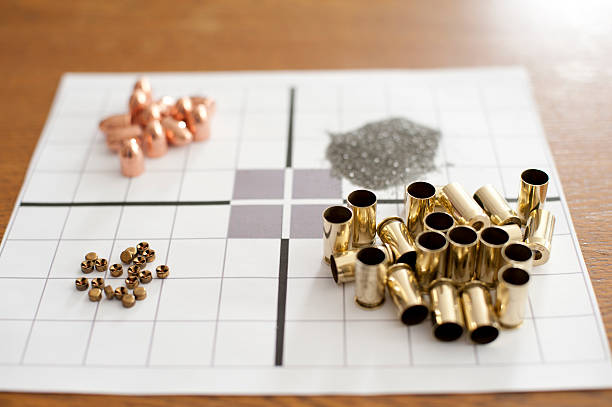
Most people reload ammo to save money and/or make custom loads for improved performance in their firearms for competitive shooting. However, I enjoy reloading my own ammunition because it’s fun – it’s one more way to be involved with tinkering with firearms/ammo without having to go to the range.
For me, not much beats having a friend over and talking about life (and guns) for a couple of hours while you work on making ammunition together.
Sure, factory ammo is convenient. However, there’s a certain amount of pride you have and performance you can achieve with reloaded ammunition that just isn’t possible with factory ammunition.
Ok, so you’re interested in reloading your own ammo, but you’re not sure how to get started…read on.
What Are The Basic Parts of Ammunition?
Ammunition comprises four basic components: the case, the primer, the powder, and the bullet.
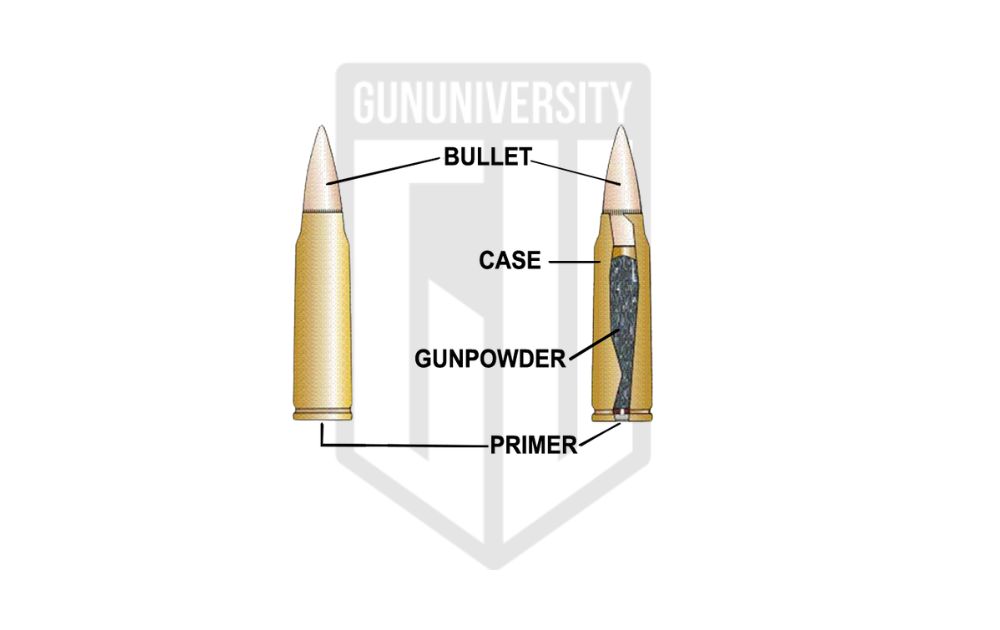
- Case: The cartridge case is what holds the other ammo components together and the only part left behind after firing. This is the part you can see being ejected from the side of most semi-automatic firearms during firing and the part which needs to be manually ejected from a revolver, lever action, pump action, or break-action firearm.
- Primer: The primer is what is struck by the firing-pin of a firearm and which ignites the gun powder. It contains a special compound that produces a flash/spark when struck.
- Powder: The gun powder is contained within the case prior to firing. The powder is ignited by the primer after it is struck by a firing pin. The powder burns rapidly (it does NOT explode) and produces gas pressure to accelerate the bullet down the barrel and out of the firearm. Powder is measured in grains. Grains (gr) is a measurement of weight and not the actual physical pieces of gunpowder. There are 7,000 grains in a pound so 1 grain of powder is 1/7000th of a pound.
- Bullet: The bullet is the part of ammunition that is fired out of the firearm towards the target. Often, the term “bullet” is used interchangeably with a round of “ammunition.” This isn’t technically correct as the bullet is only one of the four parts of ammunition, however, it’s not entirely inappropriate to use the term this way depending on the circumstance.
Note: the term cartridge refers to a complete round of ammunition, and the term caliber refers to the diameter of the bullet but can also be used to describe the particular cartridge for a gun. This can be confusing. For example, a chambered (made for) 308 Winchester ammo can also be called a 30 caliber rifle as the bullet is .308″ in diameter. However, there are many other cartridges that can be considered 30-caliber rifles.
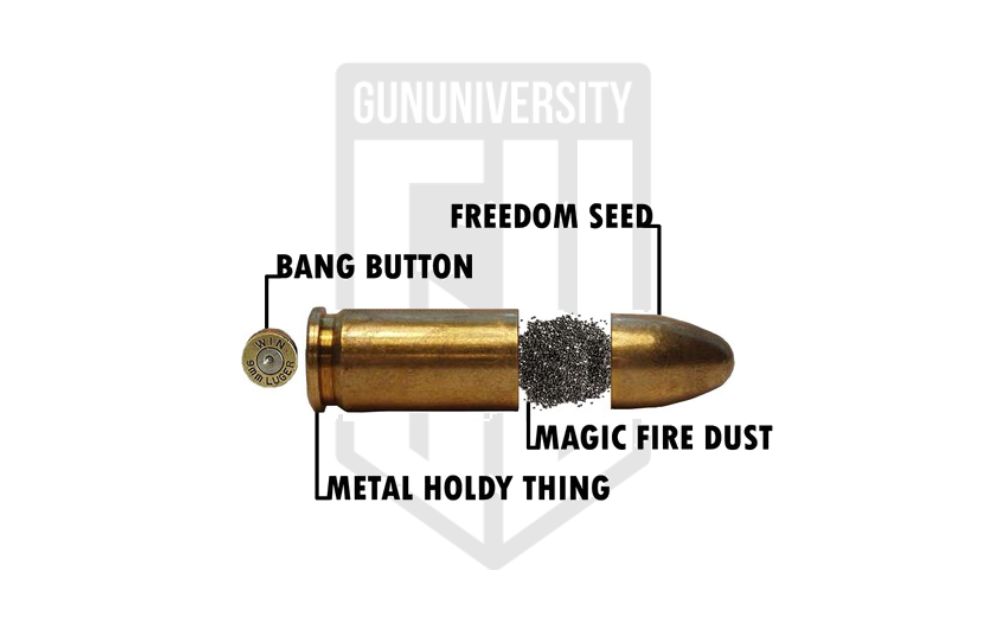
Perhaps some context would help: “I went to the store and purchased a box of ‘308’ ammo for my rifle. This brand of cartridges is my favorite for my rifle chambered in ‘308 Win.’ For hunting, I prefer 30 caliber rifles like my 308 Winchester, my 30-06 Springfield, and even my 300 Win Mag.”
Tools For Reloading Ammo
To properly reload, you will need, at a minimum:
- the components to make your ammo (cases, primers, powder, and bullets),
- a reloading manual for the correct information for your cartridge (effectively a recipe book),
- a tumbler to clean your fired brass (if you’re re-using old brass instead of using brand new),
- a reloading press (the tool used to actually make the ammo); there are three primary kinds, but you only need one
- reloading dies (parts installed into the press for your particular cartridge that remove the old primer, re-size the brass case to the correct size, and help to seat (install) the new bullet and even crimp it into place for some cartridges), and
- a powder measure (powder scales: a tool to properly weigh your powder charge)
- safety glasses
| RELOADING TOOL | GU's FAVORITE | OTHER OPTIONS | CHECK AVAILABILITY |
|---|---|---|---|
| EyePro (Safety glasses) | Radians Revelation Glasses on Amazon | GU's Top 7 | at Gun.Deals |
| Reloading Manual | Lyman 50th Edition Reloading Manual on Amazon | The Top 5 | at Gun.Deals |
| Case Tumbler | Frankford Arsenal Platinum Series on Amazon | GU's Top 6 Picks | at Gun.Deals |
| Reloading Die | Redding Type S Match Bushing Full Die Set on Amazon | Check our "best of" lineup. | at Gun.Deals |
| Powder Scale | Hornady G3 1500 on Amazon | Our Top 5 | at Gun.Deals |
| Reloading Press (You only need one) | Progressive: Dillon Precision XL750 Single Stage: RCBS Chucker Supreme Turret: RCBS Turret Reloading Press on Amazon | Progressive Single Stage Turret | Dillon Precision XL750 RCBS Chucker Supreme RCBS Turret Reloading Press |
Note: If you’re not sure which press to get, whether single, turret, or progressive, check out our review of the best reloading presses to learn more. You only have to have one.
Reloading Kits
Especially if you’re just starting out, a reloading kit can be a great place to start.
A good kit has appropriate tools and equipment to help you get started quickly and help you on your way to getting a complete reloading setup.
Check out our recommended reloading kits.
Other reloading tools you might want:
Other tools for reloading that I use regularly and recommend but didn’t include above because they aren’t a “necessity” to begin hand-loading your own ammo. There’s no real bad side to ending your reliance on the availability of factory-loaded ammo.
Suggested Ammunition Reloading Tools
- Dial calipers (helpful for checking case dimensions and bullet depth)
- Bullet puller (for fixing loading mistakes you’re sure to make)
- Sharpie pen for marking cases as you develop loads
- Cartridge boxes (for storing your newly made ammo)
Steps to reloading ammo:
Here are the steps to reloading ammunition:
- Clean fired brass
- Lubricate the brass
- Deprime and resize brass
- Install fresh primer
- Measure gunpowder
- Seat the bullet
Step 1: Clean Fired Brass
If you’re using used brass cases that have already been fired, you will need to clean them before you can start reloading ammo. If you’re using brand-new brass instead, you can skip this step.
The most common method to clean used brass is to tumble it in media to buff off any dirt, firing residue, or corrosion.
The first thing you should do is inspect each fired case to ensure that it is suitable for reloading – no excessive corrosion that weakens the case, no cracks or splits in the case, and ensure it is all the correct caliber/cartridge that you intend to reload.
The first thing you should do is inspect each fired case to ensure that it is suitable for reloading – no excessive corrosion that weakens the case, no cracks or splits in the case, and ensure it is all the correct caliber/cartridge that you intend to reload.
Reloading hack: get used to picking up a small handful of brass, covering it with your other hand, and shaking it near your ear. If there’s a split case, you can usually hear it make a unique ringing sound.
Most hand loaders use a case tumbler filled with corn or walnut media to clean and polish the brass.
My preference is to use walnut media first (or only) because it cleans really well and lasts a long time. However, it leaves the brass a bit dull in the finish.
If you’d like your brass to be polished (I like to polish my rifle brass but not my handgun brass), you can tumble the brass in corn cob media and maybe even add some brass polish. However, most reloaders I know just use corn cob media and don’t mind changing it out as often.
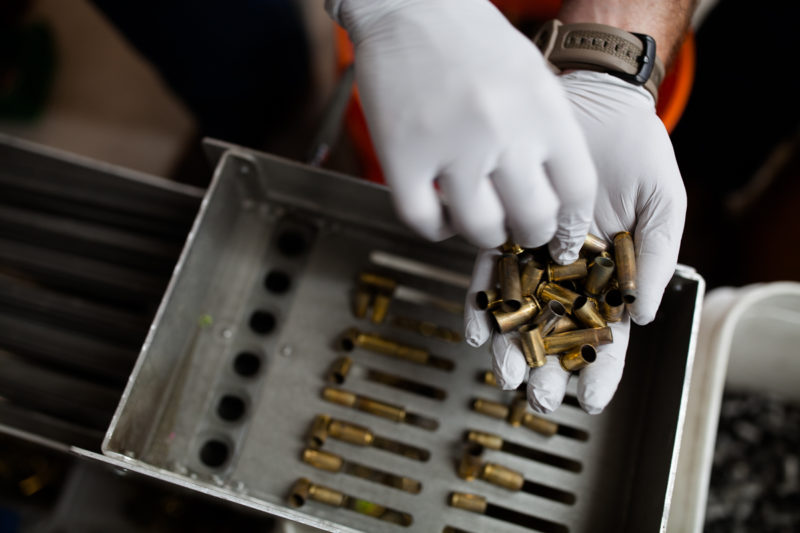
If you’re looking to get yourself a good case tumbler, please check out our article, where we list the best case tumblers.
\After you’ve cleaned your brass, you’ll need to separate the brass from the media – this can be messy (and toxic so please do this outside and wash your hands well after). I use a rotary media separator to make this easier.
Some ammo loaders are starting to use stainless steel rotary brass cleaners. These use small stainless pins, water, and detergent to clean your brass. This work exceptionally well in making for very clean brass but they are not necessary. We’ve heard of best results using these with a capful of Lemi-Shine for rifle rounds.
Step 2: Lubricate Brass
If you’re loading ammo for a rifle, this is a necessity. For rifle brass, lay the clean cases out and apply a thin but even coat of lubrication (use actual case lube).
There are case lube pads to make this easier but my favorite method is to use a shoe-box-size plastic storage tote, fill it with one layer of brass, spray in the case lube, then shake it around.
You want the cases lubed but not dripping wet.
Note: for handgun ammo, I just use quality carbide die sets. In this case, you don’t need to lubricate the brass. If the brass and reloading dies are clean, pistol ammunition is a breeze to load.
Step 3: Deprime and Resize Brass
This is the first time you’re going to be using your reloading press.
After you’ve ensured that the deprime and resizing die (it’s the same die) is set up properly (follow the die’s instructions), and you’re sure that you have the correct size shell holder for your particular loading press, insert a piece of brass and run the brass up into and then back out of the die.
The old primer should have been popped out of the primer pocket, and the brass walls should have been squeezed in or opened up back to the proper dimensions. This step will be obvious if you don’t have enough case lube for rifle brass as they’ll start to stick as you pull the brass out – if this happens, STOP and apply more lube. Otherwise, the next case may get stuck forever in your die, and no matter how much you yank down on the press handle, it either won’t budge, or the rim will rip off the brass.
Ask me how I know this.
If you used lube for rifle cases, I like to clean the brass again with corn cob media to remove the case lube residue.
Also, if you’re reloading rifle brass many times and you want consistent neck tension (how the brass holds the bullet), an annealer may be an investment worth looking into. Another investment to look into, especially if you’re making rifle ammo for accuracy is a case trimmer. This is because each time a piece of brass is fired and re-sized, it can “stretch-out” or lengthen. Using a case trimmer can get it back to teh proper length. We’ve compiled a list of the Best Case Trimmers for you. Neither of these are concerns for handgun cartridges.
After this step, lube is no longer needed.
Step 4: Install Fresh Primer
Now that your brass has been resized, it is time to install a fresh primer. We do this BEFORE adding gunpowder for two reasons:
First, the primer hole in the pocket would let the powder spill out.
Second, primers sometimes “go off” while reloading and it’s not a good idea to have that happen with powder in the case.
Please wear safety glasses from this step until the end.
You’ll need to follow the instructions on your particular reloading press to see how the primers should be installed. This can be a pain depending on the press you use and, if you’re using a single-stage press (more on this below), it can be quite time-consuming. Therefore, hand primers are a really handy (see what I did there?) tool.
With a hand primer, you can just sit there with a bucket of brass and start knocking them out. Check out our list of the best hand primers.
Special note: do not touch primers (especially the inside) with dirty or oily hands. I’ve accidentally ruined many primers by doing this and don’t find out until I’m trying to shoot the ammo later.
Depending on my schedule, I’ll sometimes stop here and just store my primed brass in storage containers where I can easily pick up where I left off. Up until this point is the time-consuming stage and with a bucket of fresh and clean primed brass, I can easily grab a few to make a handful of a particular load and be on my way.
Step 5: Measure Gunpowder
It’s now time to get into the part of reloaded ammo that’s going to make a big impact on performance, especially over factory-loaded ammunition. Yes, reloaded ammunition can be MUCH more accurate than factory ammo.
Before you do anything else, make sure that you’re using the correct powder!
Reloading hack: once you’re sure that you have the correct powder, remove all other powder containers from your ammo reloading bench so that you can’t accidentally grab the wrong jug of powder.
If you’re wondering how to know if you have the right powder, you’re on the right track!
You should consult a reloading manual to determine the best “recipe” for the cartridge you’re loading. You should look for a quality manual made by a reputable manufacturer.
My favorite manual for this is the Hodgdon Reloading Data Center.
However, if you’d like to see what other manuals are on the market, you can check them out here.
Once you know how much of which kind of powder you’re going to use, it’s time to measure the powder.
In addition to a good reloading press, a quality reloading scale is a necessity.
Next, pour the correct amount of powder into the primed case.
On a progressive press, and especially for handgun ammunition, you can use an auto powder dispenser that doses out the correct amount of powder for each rotation and raising of the press lever.
However for ultimate precision (which is not always required), measuring out a load of powder just shy of the amount you need and then using a powder trickler to add minute amounts of powder until the load is exactly what you need is handy. This is another reason to have one of the scales from our best reloading scales list – you’ll want to see the tenth of grain changes from your powder trickler.
With this latter method, you can line up your primed brass into a reloading tray and use a powder funnel to add powder to each case. This is also a very handy way to look and inspect all the cases to ensure they have powder in them before moving on to the next step.
If you load a case without powder it can be VERY dangerous – the primer is enough to pop the bullet into the barrel and if you load another round of ammo thinking you had a malfunction and pull the trigger…. kaboom. These types of rounds are called “squib loads” (Harry Potter fans will now understand why those born without magic powers in the books are called “squibs”)
Load development refers to figuring out the best load for your particular firearm – it is a very involved process and should be its own article. Here’s a tip, however, ALWAYS start on the low end of the powder range for your ammo and gradually increase. STOP shooting when you start seeing pressure signs like primer that blow out of the case during firing or signs of the brass or primer being smashed by the bolt face.
Step 6: Seat the Bullet
After you’ve double-checked that the case contains the correct powder charge of the correct powder, it is time to seat the bullet.
Bullet seating refers to installing the bullet into the case mouth. You are going to use your reloading press again for this.
After you’ve set the bullet seating die to the proper settings, you will grab a fresh bullet, hold it on top of the case as it is held in the shell holder, and then you’ll mover the press handle to insert the components into the die which will now seat the bullet to the depth you set.
For some cartridges (pistol ammo and AR-style rifle ammo) you’ll also add a crimp to help hold the bullet in place as it is jostled around in the firearm. The crimp setting is a part of the adjustments on your bullet seating die.
Here’s a note: don’t crimp too much! You’ll end up splitting your brass prematurely by over-working it.
Now that the bullet is seated, it’s time for some quick quality control inspection. Then, move on to the next cartridge!
Step 7: Bask in Your Own Glory
You’ve done it! Take a moment to enjoy a sip of that bear you’ve been drinking. Unless you’ve been doing it with a friend, in which case…
Congratulations, you are now an ammo reloader!
Hopefully you enjoyed the experience and are on to an awesome new hobby.
Single vs Turret vs Progressive Presses
In addition to the reloading equipment discussed above, let’s explore some more details.
Having a proper Reloading press is an essential part of being a reloader. However, if you’re on a budget, there’s no shame in starting small and simple and only upgrading later once you’re sure which press to get.
There are three types of reloading presses: progressive, single-stage, and turret.
A progressive reloading press can hold all of the dies at once, and in some cases even a powder dispenser and bullet and case feeder, and for every action of the press handle, a new cartridge falls out. These are the fastest way to reload and are great for high-volume pistol shooters. There’s a sub-category of progressive presses called a turret press and we’ve listed the best ones here: Best Turret Presses. I don’t own a turret press yet, but I’m considering getting one.
Although I load a lot of rifle ammunition on my progressive press (especially .223 Rem and 300 Blackout), if I’m loading for precision, I like to use my single stage press.
A single-stage press holds one die at a time and the press lever needs to be operated for each step in the process. It is also common to batch load wherein all the brass is resized, and then all the brass gets powder and so-on.
Single stage presses are slower but they are more affordable and can allow for more accurate and precise loads. My favorite single stage press is the Forster Co-Ax.
Reloading FAQ
A: Reloading ammo is only cheaper than factory ammo if you load enough of it to offset the cost of the equipment you’ll need to get started.
A: No, reloaded ammunition isn’t automatically more accurate than factory ammunition. However, if you have the right load and recipe and you take the proper care to load it well, yes, it can be much more accurate.
A: Although the two terms are sometimes used interchangeably, a bullet is a projectile that is fired from a gun, whereas a cartridge is a combination of all four component parts – case, powder, primer, and bullet.
A: Cleaning bullets is unnecessary – you should only clean the cases when loading ammo.
How to Reload Ammo: A Video Guide
Here’s an excellent beginner’s primer on video for those who prefer learning this way!
Other Ammo Reloading Resources
Check out Vintage Reloading on YouTube or Bolt Action Reloading.
Visit the illustrated guide to handloading on WikiHow.
Learn more about progressive shotgun reloading.
Recent Posts
January 30, 2026
January 29, 2026
January 19, 2026

