How To Mount A Scope In 7 Easy Steps
If you’ve got a scope that needs to be mounted on a rifle but you’re not sure how to mount a scope the right way, you’re in luck.
In this guide we’re going to walk you through all the necessary steps to properly mount a rifle scope.
Steps on how to Mount a Scope:
Below are the 7 easy steps to mounting a rifle scope:
- Gather the Right Tools
- Select the Correct Rings and Base
- Mount the Base to Your Rifle
- Attach Scope Rings to Base
- Adjust Scope Position to Fit You
- Level your Rifle Scope
- Secure Scope within Rings
With that, let’s jump in to each step to mounting a scope on a rifle.
Step 1: Gather the Right Scope Mounting Tools
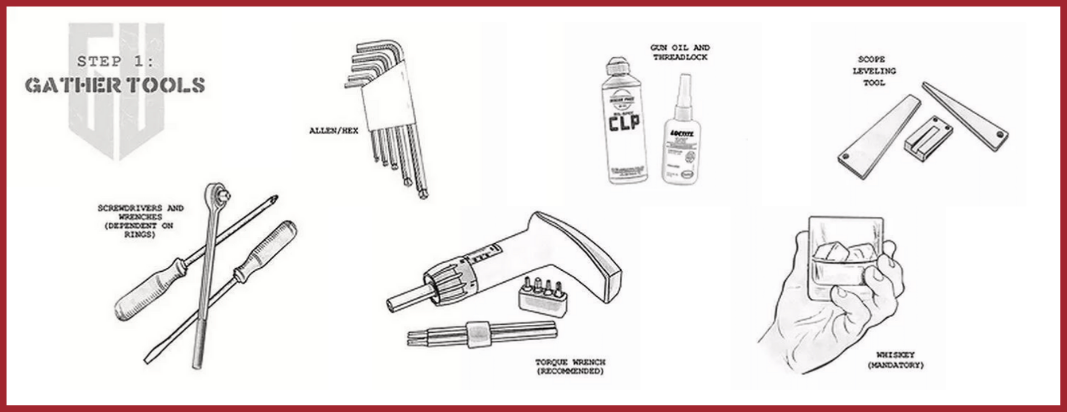
Before you can properly learn how to mount a scope, you need to start by having the right tools.
Because there are a lot of tools, and different preferences to which tools you should use when mounting a scope, we’ll provide you two lists – required tools, and some tools you can addd to make mounting a scope easier.
Required Tools
| Product | Type | Best Price | |
|---|---|---|---|
| Vortex Optics Torque Wrench set | Torch Wrench | Check Amazon | |
| Arisaka Optic Leveler Combo | Leveler | Check Price | |
| Loctite Heavy Duty Threadlocker | Locktite | Check Amazon | |
| Tipton Gun Butler | Container | Check Amazon | |
Step 2: Select the Correct Rings and Base
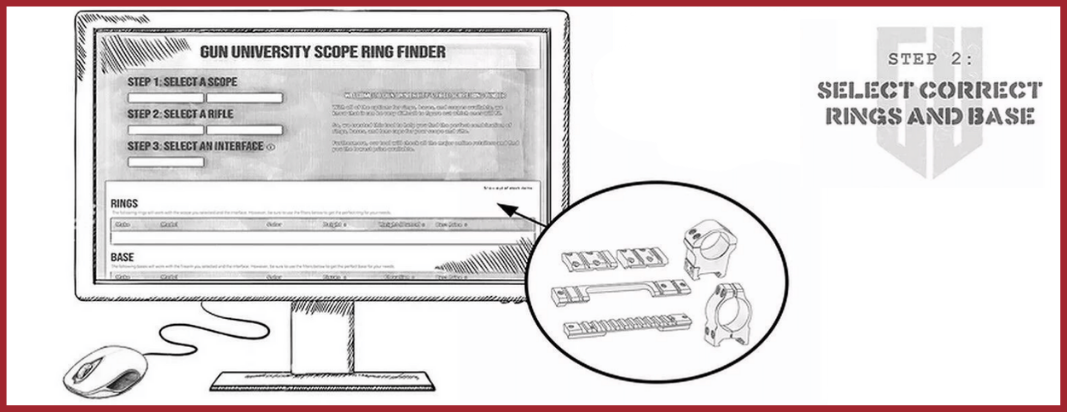
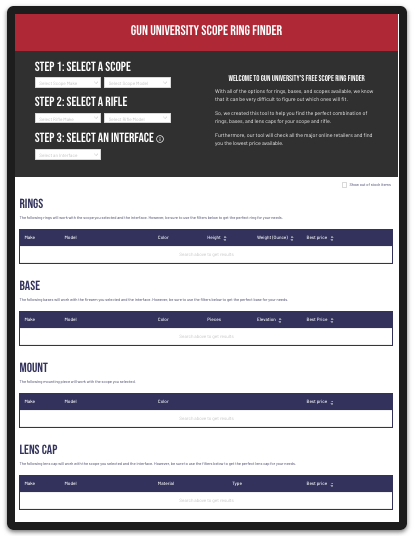
In order to properly mount a rifle scope, you’ll usually need 2 things: a rifle base, and scope rings (or if you choose an integral base, it has both of them as one thing).
Some rifles already have the scope base on it (like a picatinny rail on a AR15), however, many don’t and you’ll need to choose the right base or scope mount for what you’re doing, and ensure it fits to your rifle.
Furthermore, once you have the base, you’ll now need to find the right rings that fit your exact scope, attach to your chosen base, and have the right elevation or height so as to allow the scope to fit without touching the rifle or being too high.
As you can image manually finding the right base and rings can be extremely difficult, expansive and painful. Luckily there is a new free online tool that does this for you.
All you need to do is select your exact scope, and then the exact rifle and finally choose the type of mount/interface you want to use. If you’re not sure what type of interface, you can check out the table below for some quick details on those Base interfaces.
| Interface | Purpose | Pros | Cons |
|---|---|---|---|
| Picatinny | Tactical and/or Precision Shooting | Strong, Many mounting locations, Very common | Heavy, Bulky |
| Dovetail | Hunting, Rimfire, Small Rifles | Simple, lightweight, Many positions (front and back) | Not very strong |
| Cross-Slot/Universal | Hunting, Plinking | Inexpensive, Common | Not very strong, Limited mounting positions |
| Integral | Hunting, Lightweight rifles | Lightweight, Simple | Limited mounting positions |
| "Standard" | Hunting | - | Limited mounting positions, Old system |
| Quick Release | Hunting rifles with iron sights | Can be removed quickly to use iron sights as backup. | Limited mounting positions, not the most stable |
If you’d like to learn more about how to manually select rings and bases, instead of using the free tool above, you can check that out here.
Step 3: Mount the Base to Your Rifle
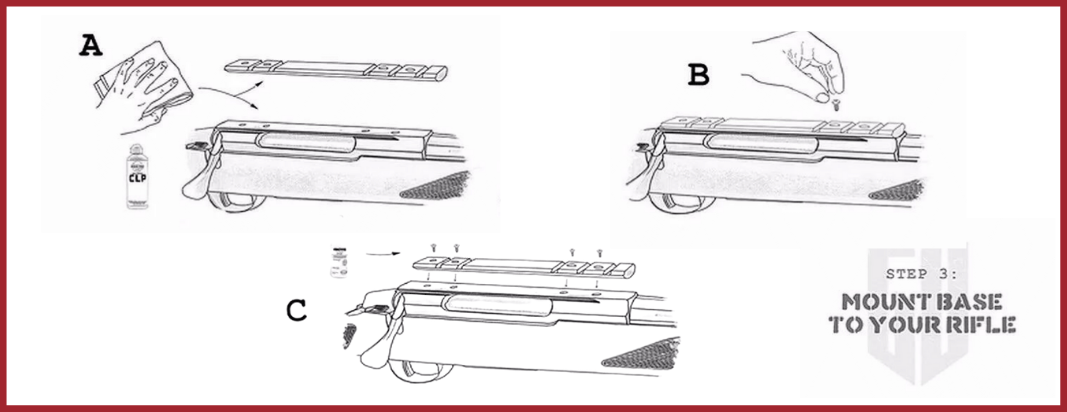
Now that you’ve got your tools and rings/bases, we’ll finally get to the first real step on how to mount a scope. If you are using a separate base (instead of an integral base that is already part of your rifle), it is time to mount the base to the rifle’s receiver. If, however, you are using an integral base, you may skip this step and move along to Step 4.
Prep Surfaces: First, ensure that the bottom of the base and the top of the receiver are clean. Next, I like to apply a very thin coat of Break Free CLP or any appropriate gun oil to the bottom of the base and the top of the receiver for rust prevention.
Test-fit Base: Ensure that the base(s) is/are oriented properly and tighten the screws through the base and into the rifle finger-tight to ensure a proper fit. Next, operate the bolt/action to ensure that the base screws are not sticking through the receiver and interfering with the bolt (it happens sometimes).
Final Installation: Remove one base screw, apply a half drop (if possible) of blue Loctite to the threads of the screw, and reinstall the screw before moving on and repeating the process with each additional screw one at a time.
If you are using a torque wrench (the best way to do this), you should not exceed 25 inch pounds and, in most cases, I use 20-22 inch pounds.
Step 4: Attach the Scope Rings to Your Base
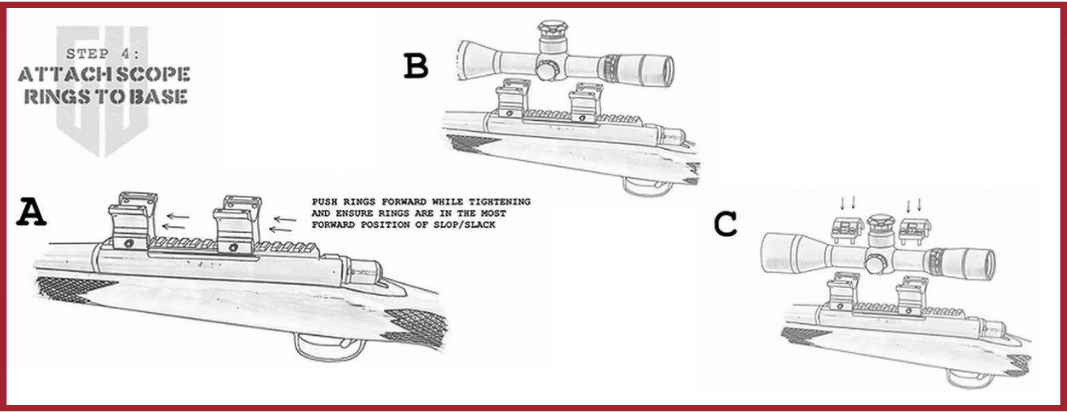
Attach the rings to the base before clamping the rings onto the scope. We do this because the base, and not the scope, will determine the spacing of your rings. The final position of your rings may change throughout this process (especially after the next step).
Attaching Rings to Base: Attach the rings to the base with the adjustment mechanism on the opposite side of the ejection.
For most bases and rings, you should notice a small amount of front to back movement (slop) between the rings and base before tightening the rings. You must ensure that the rings are pushed forward before (and while) tightening so that the rings are in the most forward position of the slop/slack.
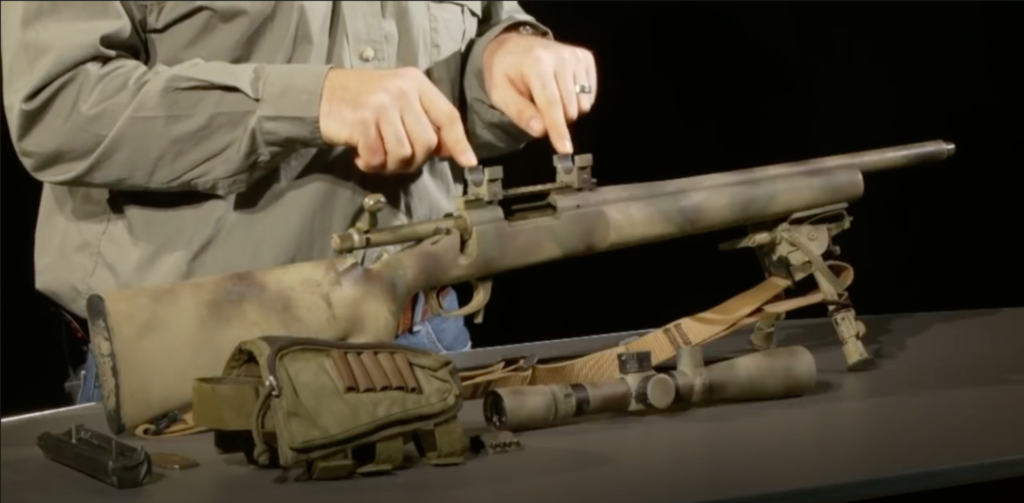
During firing, inertia will cause the rings to move forward relative to the rifle and by having them at their forward limit already, you’ll reduce their possibility of them moving once installed. There is no need to torque the rings down at this point – finger tighten them only for now as you may need to move the rings during the next step.
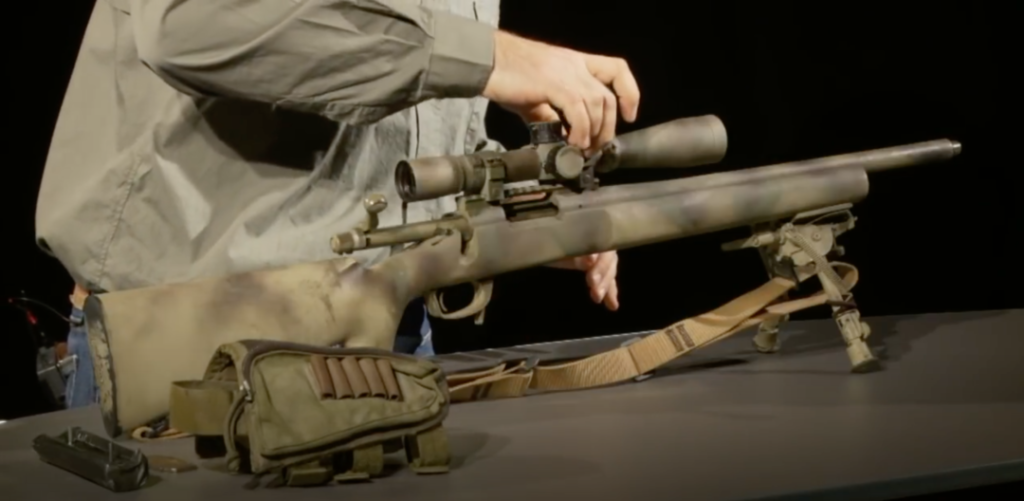
Insert Scope into Rings: Next, place the scope into the bottom half of the rings and then LOOSELY attach the top half the rings so that the scope can freely move within the rings.
Step 5: Adjust the Scope’s Position to Fit You
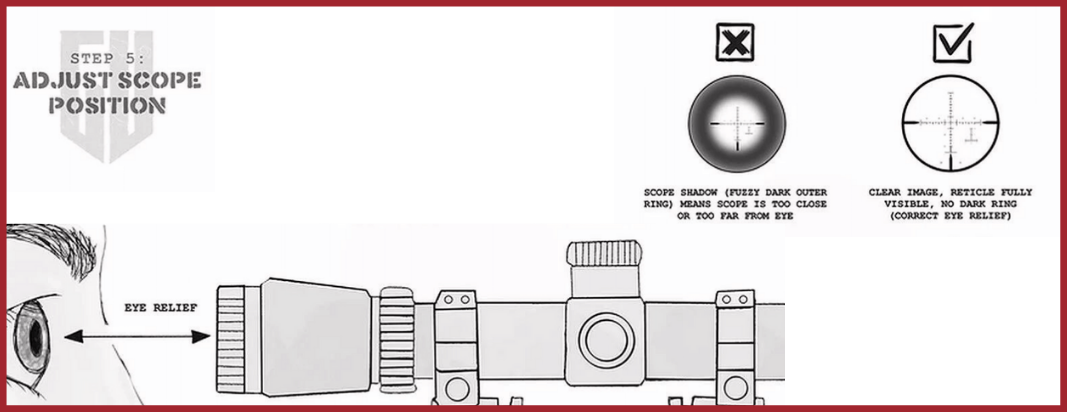
In this step, we are going to adjust the scope forward and back until you can see a perfectly clear image while in a comfortable firing position. To do this, first, position your head on the stock of the rifle as if you are preparing to fire.
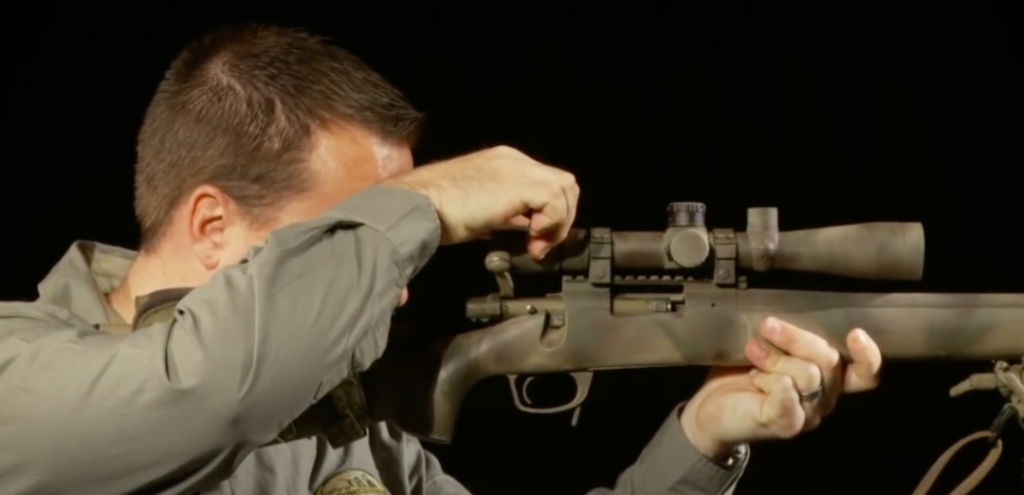
Move the Scope: If you see anything but full light around the entire optic lens, you either need to move the scope forward or backwards or your head up or down. The distance from your eye to the scope is called the ‘eye relief.’
A forward or backward adjustment is easy – you simply slide the scope until all of the black fuzzy ring has disappeared. You may find that the position of the rings needs to be adjusted in order to get the scope where it fits you. Do not panic. Move the rings and then follow the previous step before coming back to this step to confirm the scope’s position.
If you need to adjust the height of your head relative to the scope, you can either purchase taller rings or adjust the cheekpiece (comb) of your stock.
Here’s a video I made for the National Shooting Sports Foundation quite a few years ago (pre-beard) that might help you here:
Keep the rings loose enough, however, to rotate the scope to level it in the next step. A small amount of friction is all that is needed now to prevent accidental movement.
Step 6: Level Your Rifle Scope
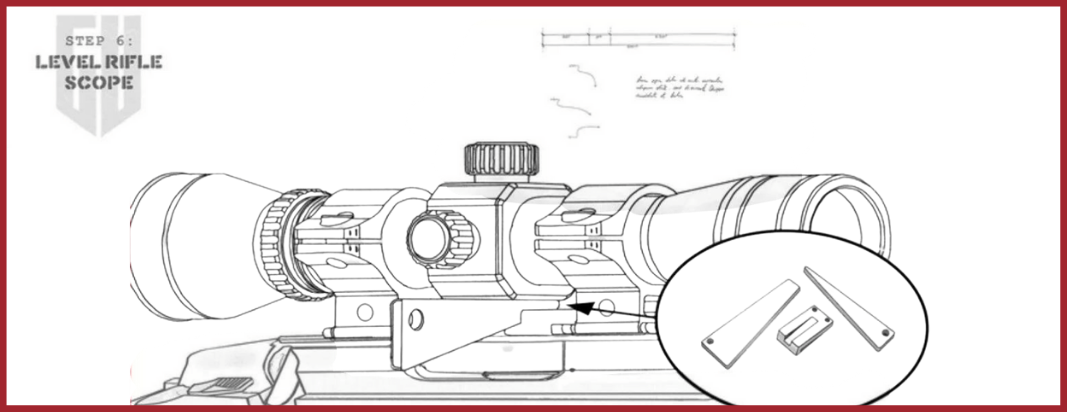
Most rifle scopes have a flat bottom that can be used to align the scope with the rail on the rifle.
Leveling flat-bottomed Scopes: Using the Scope Leveling tool we recommend above, put the base of the tool on the rail and use one of the tool’s wedges (there should be a low and a high wedge) to align the flat bottom of the scope body to the rail.
By having the rings loose enough that the scope can be rotated, you should be able to insert the tool’s wedge so that the scope rotates and aligns itself. Once level, finger-tighten the scope rings. It’s that easy.
Leveling round-bottomed Scopes: These types of scope are much more difficult to level. Thankfully, these types of scopes are fairly rare.
You can either use a series of levels to level the rifle first and then level the scope by placing a level on the top scope cap, or you can do your best to “eyeball” it.
Step 7: Secure the Rings to the Rifle and Scope
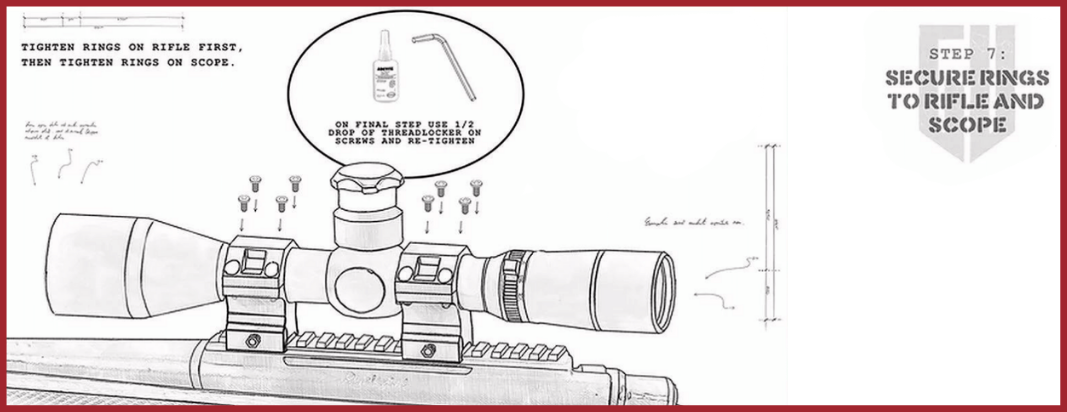
Now comes the final step on how to mount a scope. It is time to fully tighten the rings around the scope. Tighten the rings around the scope by turning the screws in an X pattern (similar to changing a wheel on a car) while ensuring that the gap on each side of the rings is similar.
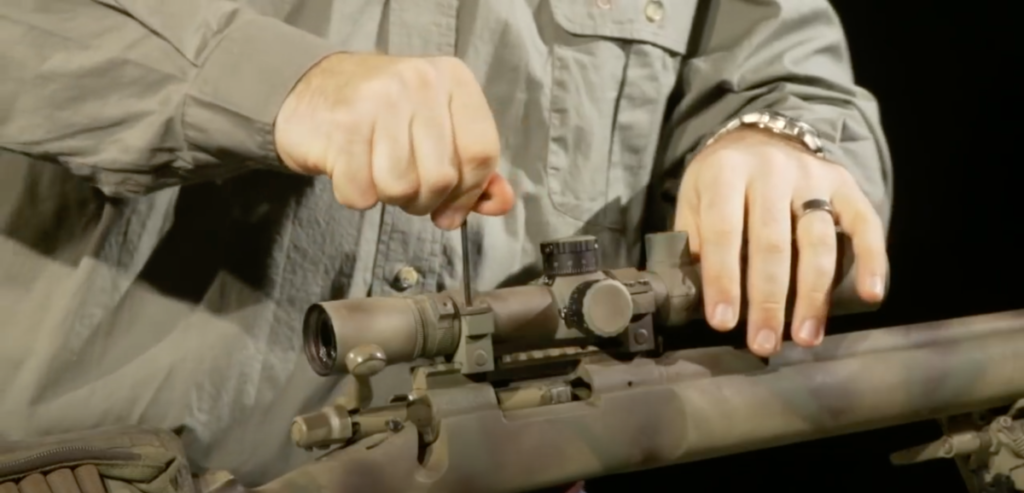
I like to use 15 inch pounds of torque on the scope ring screws for most scopes. If the scope is really heavy duty and it’s going on a heavy recoiling rifle, you can go up to 20 inch pounds if you’d really like. Here are the torque settings I like to use:
| Scope Mounting Component | Preferred Torque | Maximum Torque |
|---|---|---|
| Rifle Base | 20-22 in/lbs | 25 in/lbs |
| Tactical rings to base | 65 in/lbs | 65 in/lbs |
| Hunting rings to base | 20 in/lbs | 25 in/lbs |
| Scope rings around scope | 15 in/lbs | 20 in/lbs |
Apply Thread Locker: Once everything looks good, you can now apply thread locker to the scope rings. One by one, just like with the base, remove each scope ring screw and apply a half drop of blue Loctite and reinstall the screw to the proper torque.
Further Reading for Mounting Your Scope
Learning how to mount a scope to your rifle is just the first step. You’ll still need to zero, and adjust as well, before you even get into long range shooting. Therefore, here is knowledge on working with your rifle and scope that you should definitely check out:
- How to Zero Your Scope: Now that you’ve got your scope attached, you’ll need to learn how to zero or sight the scope so that it fires accurately.
- How to Adjust Your Rifle Scope: When your out at the range, you’re going to need to be able to adjust your rifle scope in accordance to the distance you’re trying to hit. This process is very technical, but once you’ve got it down, it will be an extremely important skill.
- Learning About Minutes of Angle (MOA): An important term in long range shooting is MOA. It’s key to zeroing a scope as well as adjusting your scope, and even calculating out your actions for distances. So, be sure to check that out.
- Learning About Milliradians (MIL): If you aren’t using MOA, then you’re probably using MIL – so be sure to learn about MILs and how to use them when zeroing your scope.
- Basics to a Rifle Scope: In case you haven’t chosen a scope, and aren’t sure what to look for, here is a great article explaining the parts to a rifle scope and different reticles.
In these articles, we’ll have examples like the below, so as to give you live situations and practice:

Scope Mounting FAQ
Only blue Loctite should be used on scope rings and bases as it is not a permanent hold.
No, it is not necessary to lap scope rings. Yes, it can ensure that the rings are true, however, you should buy quality scope rings that do not need lapping and still save money over buying a ring lapping kit.
Yes, it is very easy to over-tighten scope rings on to a scope. Too tight of rings can actually impede a scope’s ability to function.


