How to build a Glock at Home: Step by Step Guide
Under federal law, it is currently perfectly legal to make your own firearm at home. These homemade firearms (standard rifles, shotguns, or handguns) do not need serial numbers, approval, or registration.
Anti-gunners sometimes refer to these home-built firearms as “ghost guns” because they can’t be traced nor registered and they are actively trying to ban them. In fact, some states have already started making requirements for serialization or registration for these guns.
Therefore, if you’ve been thinking about making your own homemade gun, you should do it now before they’re prohibited.
In this article, we’re going to walk you through how to build your own Glock-style pistol at home.
First, a couple of disclaimers:
- This applies ONLY to federal law. Your state may restrict this activity and/or certain firearms
- You must still file for approval with the ATF for NFA firearms (silencers, short-barreled rifles, etc.)
How to Make Your Own Glock
We’re going to walk you through the entire process to build your own Glock 19 at home – however, this process will work for making any Glock pistol.
One of the benefits of making your own custom Glock 19 is that you have a lot of choices you can make about the firearm you are going to build at home.
Of course, all of those choices for each part of the gun may be overwhelming so we are going to help you with lists for three sample builds of a compact or Glock 19-sized pistol:
- Mostly Glock Build (where every possible part is OEM Glock – except for the frame)
- Budget Non-Glock Build (where NO parts are made by Glock, not even pins or springs)
- Ryan’s Build (where Ryan will pick out his favorites for inspiration for your build)
- Overall Budget Build (this build will only be featured in the final build tables at the bottom of this article because it will incorporate the cheapest option of each of the three builds as we go)
In each step of the process below, we’ll list some of the parts you can choose from and highlight which options match each of the builds above.
At the end of this guide, we’ll share the complete parts list for each!
We’ll start with which parts to get for your homemade Glock 19 and then move into how to make/assemble them!
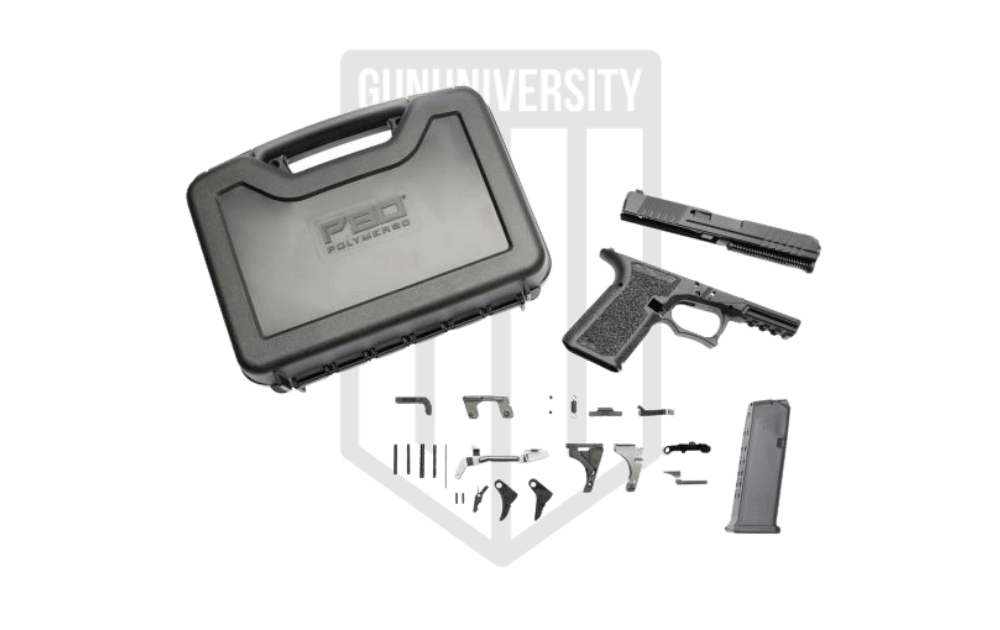
UPDATE: Polymer80 now makes a COMPLETE GLOCK kit wherein you just purchase the kit and it includes every part you need to make your own Glock 19 at home. This is, without a doubt, the cheapest and easiest way to build your own gun. However, if you’d like to choose each part yourself for a completely customizable experience, keep reading.
Building a Glock 19
- Step 1 – Choose Your Pistol Frame
- Step 2 – Choose Your Lower Parts
- Step 3 – Choose Your Slide
- Step 4 – Choose Your Barrel
- Step 5 – Choose Your Slide Parts
- Step 6 – Choose Your Sights
- Step 7 – Choose Your Magazine
- Step 8 – “Make” Your Frame
- Step 9 – Assemble Your Homemade Glock
- Step 10 – Have fun!
If you’d like to skip to the end to see the complete build lists to make purchasing the parts for your gun easier and faster, you can jump straight to: Complete Build Lists
Step 1 – Choose Your Pistol Frame

If you’re truly building your own firearm, you must actually “make” the frame or receiver. If you use a factory-made frame or receiver then you will surely be assembling the rest of the gun yourself, however, the gun wouldn’t truly be “made” by you.
Under federal law, only firearms (and their frames/receivers) that are made by a licensed manufacturer (FFL) must be marked with certain markings – these include a serial number.
Therefore, if you are making this firearm for yourself, and don’t intend to sell it, you don’t need an FFL and you don’t need to mark it with manufacturer markings or a serial number (under federal law)!
IMPORTANT NOTE: Your state may require markings.
In fact, you can even decide to sell it later – you just can’t build it with the intent to sell – BE CAREFUL HERE!
If you think you’d like to do this for some side income (or even a full-time business), you really should look into getting your FFL. It’s not as difficult as you might think, you can get it from your own home, and it’s a great way to save money on guns, make money with guns, and be the “go-to source” in your circle of firearms friends.
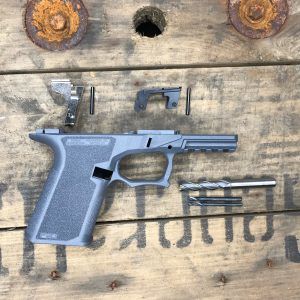
Polymer 80 Glock Frame

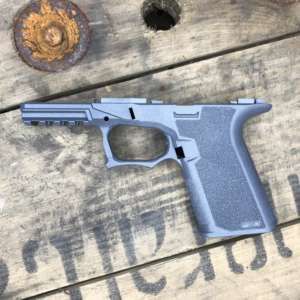
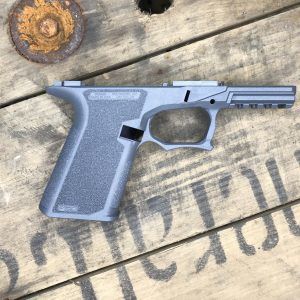
We recommend using the Polymer 80 frame for your pistol build.
The term “80% receiver” is NOT a legal term. Do not be confused here. An object is considered a firearm once it is able to be readily converted to expel a projectile. This means sometime before it is finished, the ATF will consider it a firearm!
Most companies that sell “80%” receivers have obtained approval from ATF that their product hasn’t crossed that magical line yet. This means that when you finish the work, you’re the true manufacturer of the firearm.
Don’t start from scratch – use one of these kits! This is because the percentage has nothing to do with the determination of a firearm – if you did the wrong 10% first, you’d have a firearm even though it’s only 10% complete.
If you’d like to learn more, check this out: 80% Receivers
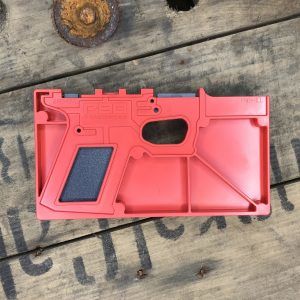
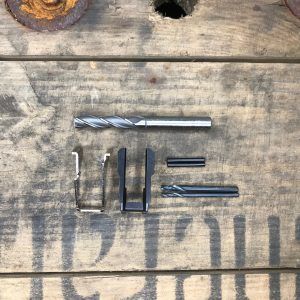
The Polymer 80 frame kit comes with a polymer pre-frame, a jig to help you finish the pre-frame into an actual firearm frame, the necessary drill bits to create the firearm, and the front and rear inserts for the frame rails. This is not the same as the full kit that includes every part – that is the Polymer 80 AFT Glock Kit.
The Polymer 80 frame is available in various colors and grip textures:
Colors: The Polymer80 kit is available in Black, Flat Dark Earth (FDE), Coyote, TacGrey (Grey), OD Green, Robin Egg Blue, White, and Cobalt.
Textures: The Polymer80 kit is available in a standard textured grip, an aggressive texture, and ReadyMod variant that comes with a smooth grip that is ready to be custom textured via stippling with a soldering iron or with a laser.
PAY ATTENTION TO THE SIZE OF YOUR FRAME!!!
If you purchase a “19” sized frame like me for a Glock 19 build, you MUST ensure that you are purchasing parts for a “19”-sized Glock as you go.
For example, if you weren’t paying attention, it would be very easy to accidentally purchase a barrel or a lower parts kit for a “17.” Neither will work properly with your “19” build!
| Part | Cost | |
|---|---|---|
| Mostly Glock | Any Polymer 80 Frame Kit | $149.99 |
| Budget Non-Glock | Any Polymer 80 Frame Kit | $149.99 |
| Ryan’s Choice | Grey Aggressive Texture 19 | $149.99 |

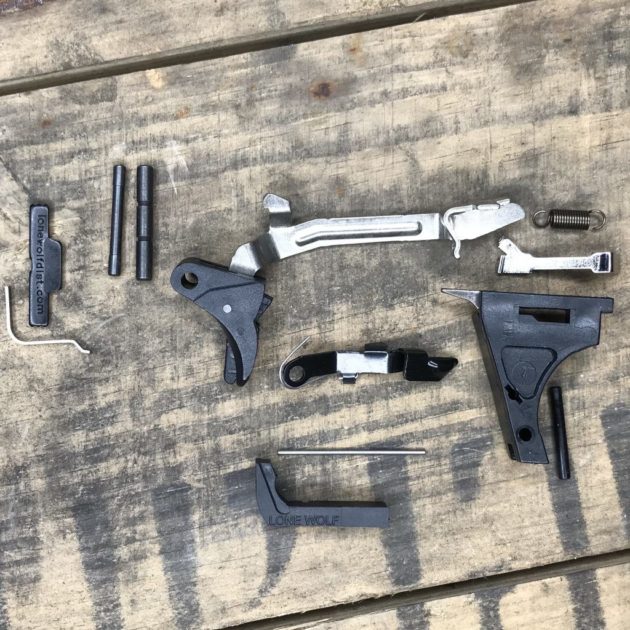
Step 2 – Choose Your Lower Parts

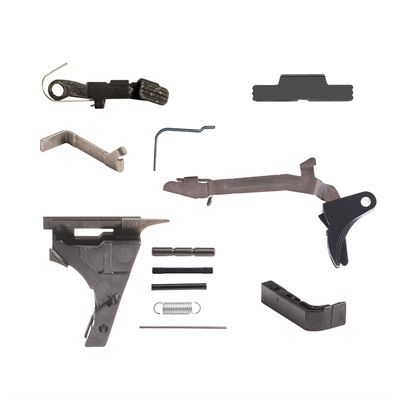
The lower parts are what will be installed in your pistol frame.
The frame parts for a Glock include:
- Magazine Catch Spring
- Magazine Release
- Trigger Housing Pin
- Locking Block Pin
- Slide Lock, Slide Lock Spring
- Extended Slide Stop Lever with Spring
- Trigger Housing with Ejector
- Connector
- Trigger Spring
- Trigger with Trigger Bar
- Trigger Pin
You can either purchase all of these parts together in a kit or you can purchase each part individually.
The simplest (and least expensive) option is to purchase a complete kit. However, if you’d like to truly customize your pistol build, purchasing the parts individually might be your best option.
Some of the most commonly customized parts for Glock pistols include triggers, connectors, and magazine releases. We’ll explore each option below.
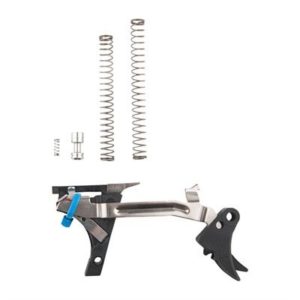
Glock Lower Parts Kits
There are two options for lower parts kits:
Glock Parts Kit: This kit includes all of the parts listed above. The connector is a factory 5 lb connector and the magazine release is the factory extended-release.
Non-Glock Parts Kit: This kit includes mostly non-Glock parts. As far as I know, nobody makes a non-Glock trigger housing. Therefore, I guess it’s impossible to make a truly non-Glock Glock…but we can get close. This kit comes with a 3.5 lb connector, extended slide release, extended take-down lever, and an extended magazine release.
If you’d like to customize these parts other than what the kits come with, you’ll need to purchase each part individually or purchase one of the kits above along with whichever custom part you want and then simply not use the replaced part from the kit above.
Individual Glock Lower Parts
We’re going to cover the most popular upgraded parts. If you buy one of the kits above, you don’t need to purchase any individual parts below.
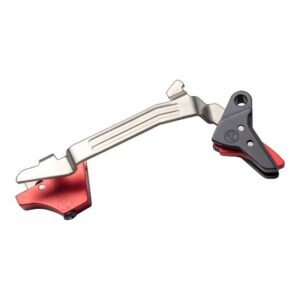
TRIGGER:
If you want a Glock-style trigger, you might as well go with one of the kits above. If you’re going to go with a custom option, however, purchasing an individual trigger is your only way to go.
Zev Tech Trigger Kit – $180.00
The Zev Tech trigger is amazing. However, I have adjusted these too light and had reliability issues. Therefore, I use these for “fun” guns (plinking/competition) and not defensive guns. This trigger kit comes with a neat feature: a set-screw in the trigger housing that allows you to easily adjust for over-travel.
If you go with this trigger kit, you’ll also get a trigger housing with an ejector, trigger spring, and connector. You’ll also be getting striker springs and a firing pin safety and spring. This is something to keep in mind when we’re covering the slide parts below.
Timmy Triggers Alpha Glock Trigger – $149
Timney is known for making quality after-market triggers for many firearms.
Although I have no personal experience with this particular trigger, I have no problem recommending it for your Glock build.
Here are a few more of our part recommendations:
CONNECTOR:
Mostly Glock: GLOCK – Connector, 8 lb.
Budget Non-Glock: Lone Wolf Dist. – 3.5 Connector
Ryan’s Choice: Ghost – Rocket 3.5 Trigger Connector
SPRINGS:
Mostly Glock: GLOCK – Trigger Spring
Budget Non-Glock: Zev Technologies – Trigger Spring
Ryan’s Choice: Ghost – Complete Spring Kit
SLIDE STOP:
Mostly Glock: GLOCK – Slide Stop
Budget Non-Glock: TangoDown – Vickers Tactical Slide Stop
Ryan’s Choice: TangoDown – Enhanced Slide Stop
TAKE-DOWN LEVER:
Mostly Glock: GLOCK – Slide Lock
Budget Non-Glock: Lone Wolf Dist. – Extended Slide Lock Lever
| Part | Cost | |
|---|---|---|
| Mostly Glock | Glock Parts Kit | $71.99 |
| Budget Non-Glock | Non-Glock Parts Kit | $51.99 |
| Ryan’s Choice | Non-Glock Parts Kit | $51.99 |
| Zev Tech Trigger Kit | $180.00 | |
| Ryan’s Build Total | $231.99 |
Step 3 – Choose Your Slide

If you’re wanting to build the “mostly-Glock” option, this could be a difficult step for you. This is because Glock factory slides are available, however, they can be hard to find and are often used.
If you’ve already got a Glock at home…great! You can borrow that slide until you’re ready to upgrade.
I wanted to take this opportunity to have a truly custom pistol so I am opting for an aftermarket slide. Here are the best options for aftermarket Glock slides:
Lone Wolf Alpha Wolf Slide – $174.95
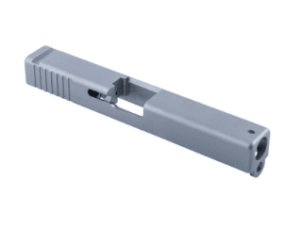
If you’re looking for a budget build, this is the least expensive slide I could find – I have no personal experience with this stainless steel Glock slide.
Brownell’s Front-Cut RMR Slide – $209.99
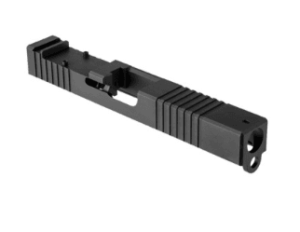
This slide is an amazing value for your Glock builds!
I was very leery of purchasing it (spoiler alert- it’s the one I went with) because the cost is so low compared to other slides. However, I thought it was worth the gamble because it was so close to being the cheapest slide and it had the features I wanted: forward cocking serrations AND an RMR cut.
I am happy to report that this slide works great! But, its squared-off edges might make fitting into certain holsters an issue.
Of course, these are just a FEW options for your Glock slide. To see the rest of your choices, check out Brownell’s Glock slides.
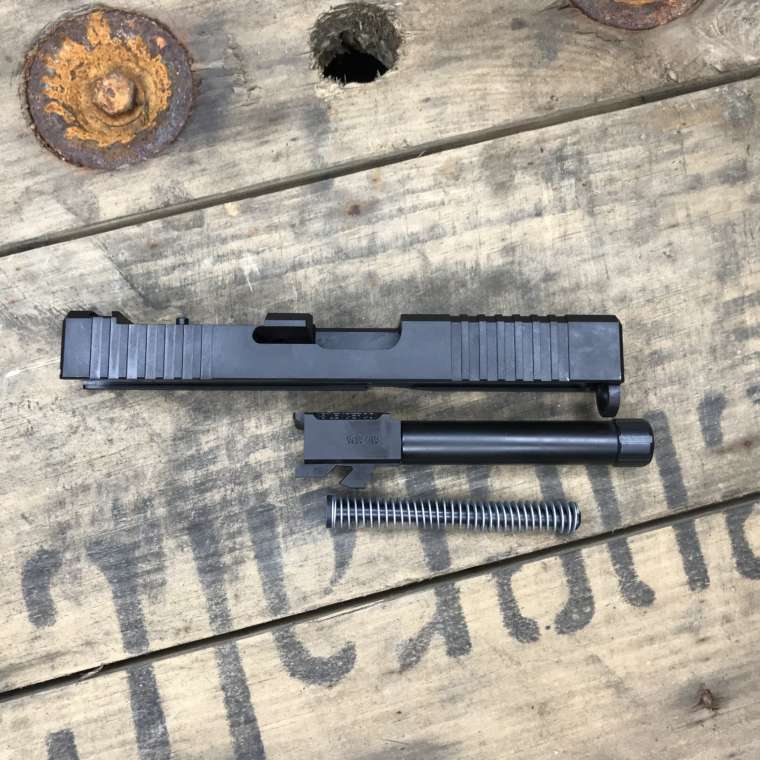
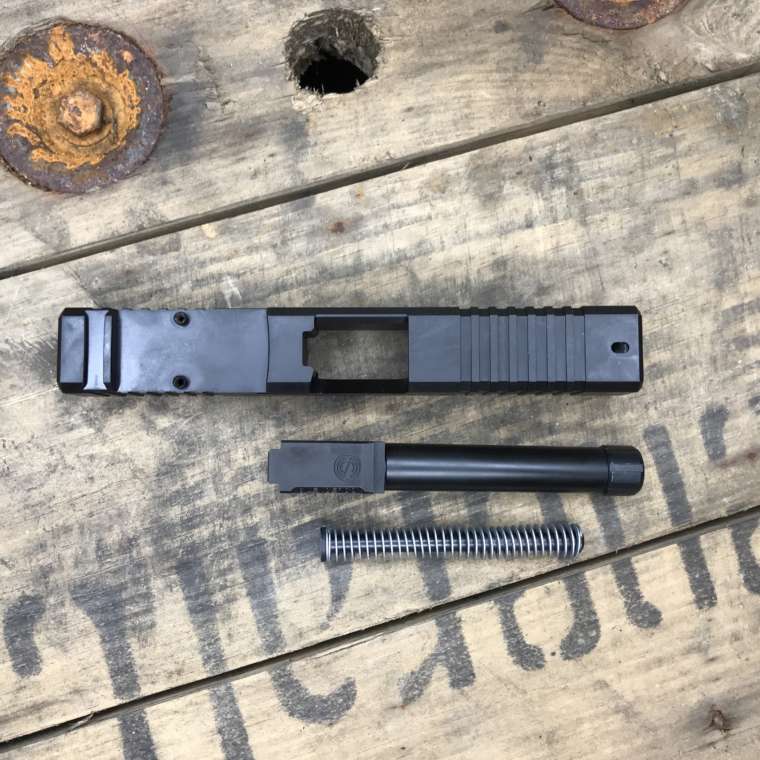
Here are some pictures of the slide I selected along with the barrel (covered next) and recoil spring.
| Part | Cost | |
|---|---|---|
| Mostly Glock | Glock Factory Slide | $325.00 |
| Budget Non-Glock | Lone Wolf – Alpha Wolf Slide | $174.95 |
| Ryan’s Choice | Brownell’s Front-Cut RMR Slide | $209.99 |
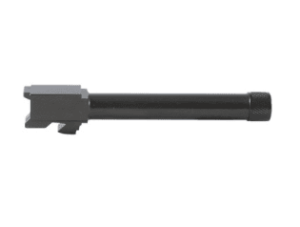
Step 4 – Choose Your Barrel

There are MANY options for Glock barrels.
Glock Factory Barrel – $149.99
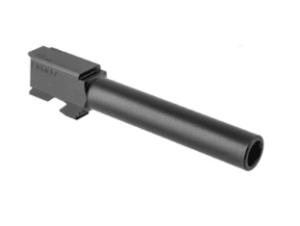
Glock factory barrels are awesome.
I know that it is popular to upgrade a Glock’s barrel but I encourage you to consider using your factory barrel first if you have one handy because these OEM parts are great.
The Glock barrel is reliable and plenty accurate. I didn’t go with one on this build because I thought it would be fun to avoid Glock brand parts.
However, all of my other Glocks, even those with threaded barrels, have factory barrels. In fact, I prefer Glock factory threaded barrels because the metric threads allow for a better silencer mount.
So, unless you’re trying to go “non-Glock” on this build (like me), you really should consider one of the factory barrels.
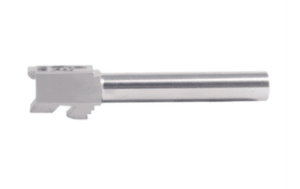
The Lone Wolf Barrel is the cheapest barrel I can find for a Glock. Unless you can’t afford to, please consider a better barrel.
In my experience with these barrels, they can work, but they are very finicky with ammo. If your slide’s dimensions are slightly tighter than the factory dimensions (common for a “tighter” lock-up), then this barrel likely won’t fit, and/or function.
So, doing an “el-cheapO” build? Go with this barrel. Want some reliability? Go with a nicer barrel, please.
Bar-Sto Semi-Fit Barrel – $264.99
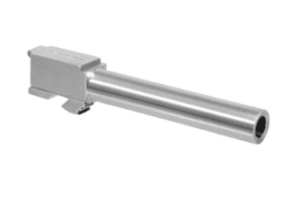
Bar-Sto is known for making great replacement Glock barrels.
This barrel is “semi-fit” which means that it might require some “fitting” to work properly in your gun.
Many competition shooters swear by Bar-Sto barrels for their accuracy potential.
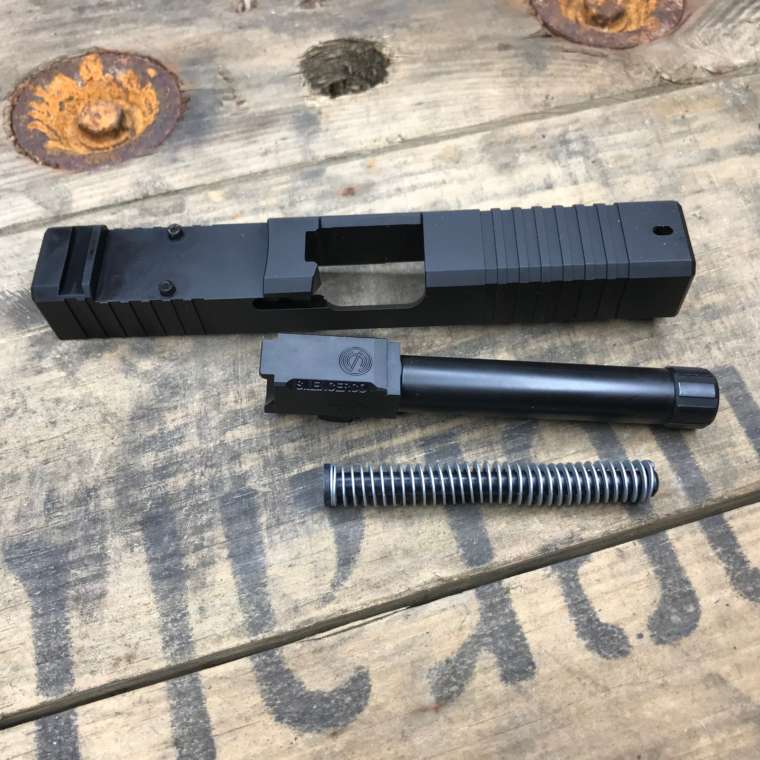
SilencerCo Threaded Barrel – $178.99
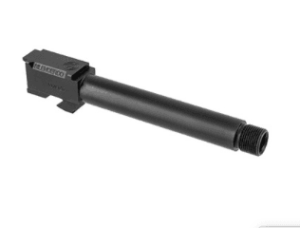
This barrel seems to be the best value for a threaded Glock barrel.
This is the barrel I chose because I wanted the ability to add a silencer and perhaps a muzzle brake.
I wasn’t sure about the quality of it, but I can tell you that I’m already 500-rounds into mine and it works great!
If you’re looking for a threaded barrel, Storm Lake is another option that won’t break the bank.
However, you will be gambling a bit with quality. I’ve seen AMAZING Storm Lake barrels and I’ve seen HORRIBLE Storm Lake barrels. You might get a good one and you might not. I personally avoid these and the AAC branded barrels because they are also made by Storm Lake.
As you know, I went with the SilencerCo barrel and I am very happy that I did! I can shoot with a silencer and my non-Glock Glock functions great! You can see pictures of the barrel above next to my slide.
| Part | Cost | |
|---|---|---|
| Mostly Glock | Glock Factory Barrel | $149.99 |
| Budget Non-Glock | Lone Wolf Barrel | $139.95 |
| Ryan’s Choice | SilencerCo Threaded Barrel | $178.99 |
Step 5 – Choose Your Slide Parts

Glock Slide Parts Kit – $89.99
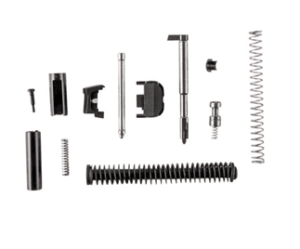
Let me save you some trouble…unless you want “upgraded” parts, just go with this kit!
Even if you want to upgrade your striker, it still may be a better option to get this kit and use your replacement striker and save the factory one as a backup.
Lone Wolf Slide Parts Kit – $79.95
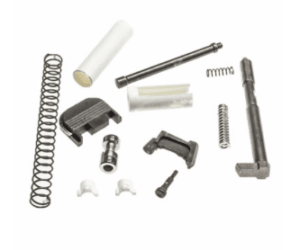
In my effort to have a non-Glock Glock (for no reason other than novelty), I went with this kit.
I should have gone with the Glock factory kit above. Not only would it have been cheaper, but the parts would likely have been better.
Most of the parts in this kit seemed ok (who really knows) but the striker looks like a piece of junk. It has worked for me so far but I might end up “upgrading” to the factory part.
| Part | Cost | |
|---|---|---|
| Mostly Glock | Glock Factory Kit | $89.99 |
| Budget Non-Glock | Lone Wolf Slide Parts Kit | $79.95 |
| Ryan’s Choice | Lone Wolf Slide Parts Kit | $79.95 |
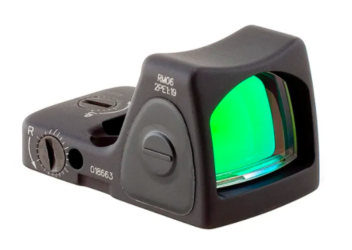
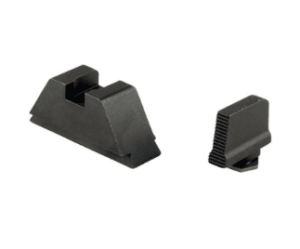
Step 6 – Choose Your Sights

Trijicon RMR Adjustable – $489.99
AmeriGlo Suppressor Height Sights – $44.99
| Part | Cost | |
|---|---|---|
| Mostly Glock | ||
| Budget Non-Glock | ||
| Ryan’s Choice | Trijicon RMR Adjustable | $489.00 |
| AmeriGlo Sights | $44.99 |
Step 7 – Choose Your Magazine

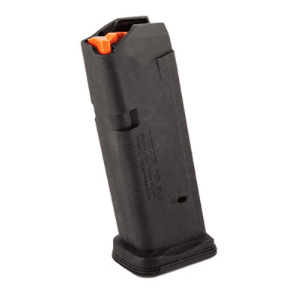
I went with this Magpul magazine to keep up the non-Glock theme of my build.
I must admit, I never knew the appeal of a MagPul Glock magazine when the factory magazines are relatively inexpensive and extremely reliable (I think that part of a Glock’s reliability is its excellent magazines).
Glock Factory Magazine – $27.99
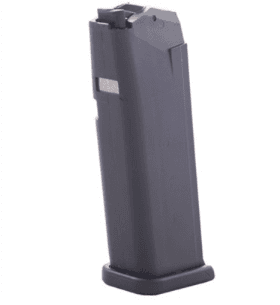
You can’t go wrong with OEM Glock magazines.
Especially if you’re looking for “high-capacity” magazines like my personal favorites, the Glock 33-rounders.
| Part | Cost | |
|---|---|---|
| Mostly Glock | Glock Factory Magazine | $27.99 |
| Budget Non-Glock | Magpul G19 Magazine | $13.99 |
| Ryan’s Choice | Magpul G19 Magazine | $13.99 |
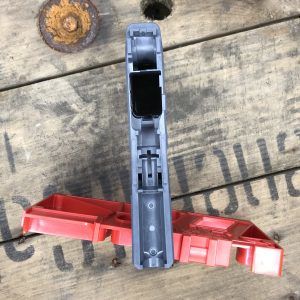
Step 8 – “Make” Your Frame

Making a Polymer80 Frame into a firearm can seem daunting – but don’t worry….it’s actually very easy!
Polymer80 frames come with instructions that are very complete/detailed. You can view/download their pdf instructions here.
They also have a great video that walks you through, step by step, how to complete a Polymer80 frame.
However, a mill or a drill press is NOT necessary – we completed the frame in this build with a cordless drill (for the holes) and used hand files to complete the frame. The hand files may have taken a bit longer (not much) but we were VERY happy with the results.
Doing it by hand gave us all the control we wanted whereas a drill press may have gotten out of control.
Here are the files we used:
Step 9 – Assemble Your Homemade Glock

For help assembling all of the parts you just purchased for your home-built Glock pistol, here are some videos:
Assembling the lower (frame):
Assembling the upper (slide):
Step 10 – Have Fun!

Build Lists

If you’re looking for the absolute cheapest option to have a homemade Glock, I recommend that you purchase a complete Glock (new or used), then purchase a Polymer80 kit and then replace and sell the factory frame. It just isn’t possible to beat that price.
Ryan’s Build
| Part | Part Type | Cost |
|---|---|---|
| Frame | Grey Aggressive Texture 19 | $149.99 |
| Lower Parts | Non-Glock Parts Kit | $51.99 |
| Trigger | Zev Tech Trigger Kit | $180.00 |
| Slide | Brownell’s Front-Cut RMR Slide | $209.99 |
| Barrel | SilencerCo Threaded Barrel | $178.99 |
| Slide Parts | Lone Wolf Slide Parts Kit | $79.95 |
| Optic | Trijicon RMR Adjustable | $489.99 |
| Sights | AmeriGlo Suppressor Height Sights | $44.99 |
| Magazine | Magpul G19 Magazine | $13.99 |
| Total (with RMR) | $1,399.88 | |
| Total (w/o RMR) | $889.89 |
Mostly Glock Build
| Part | Part Type | Cost |
|---|---|---|
| Frame | Any Polymer 80 Frame Kit | $149.99 |
| Lower Parts | Glock Parts | $71.99 |
| Trigger | Zev Tech Trigger Kit | $180.00 |
| Slide | Glock Factory Slide | $325.00 |
| Barrel | Glock Factory Barrel | $149.99 |
| Slide Parts | Glock Factory Kit | $89.99 |
| Optic | Trijicon RMR Adjustable | $489.99 |
| Sights | AmeriGlo Suppressor Height Sights | $44.99 |
| Magazine | Glock Factory Magazine | $27.99 |
| Total (with RMR) | $1,529.93 | |
| Total (w/o RMR) | $1,039.94 |
Budget Non-Glock Build
| Part | Part Type | Cost |
|---|---|---|
| Frame | Any Polymer 80 Frame Kit | $149.99 |
| Lower Parts | Non-Glock Parts Kit | $51.99 |
| Trigger | Zev Tech Trigger Kit | $180.00 |
| Slide | Lone Wolf - Alpha Wolf Slide | $174.95 |
| Barrel | Lone Wolf Barrel | $139.95 |
| Slide Parts | Lone Wolf Slide Parts Kit | $79.95 |
| Optic | Trijicon RMR Adjustable | $489.99 |
| Sights | AmeriGlo Suppressor Height Sights | $44.99 |
| Magazine | Magpul G19 Magazine | $13.99 |
| Total (with RMR) | $1,325.80 | |
| Total (w/o RMR) | $835.81 |
About Ryan Cleckner
Ryan Cleckner is a former special operations sniper (1/75 Ranger) and current firearms attorney, firearms industry executive, university lecturer, and bestselling author of the Long Range Shooting Handbook. You can find him at ryancleckner.com.
Recent Posts


March 7, 2026

March 7, 2026

March 7, 2026
timeko ugaya
Some of us just like to build shit. I’ve got a corvette that I built from the frame, cheaper to buy but better to build.
Love the intention of this article but it is definitely outdated when it comes to pricing and build options. The Glock clones market has really blown up recently with Palmetto Palms Dagger being released earlier this year. There are other manufacturers getting on the band wagon. The Glock 19 model is the AR-15 of handguns. I said what I said, hate me if you must! You have some manufacturer/suppliers like AimSurplus providing build kits and components. The PSA dagger is $299 right now and I just put together parts to build a budget Glock clone for a little over $300. Instead of updating this article, a better article might be about Glock clones and the advantages of going this route. Some might be warranty and manufacturer support, others might be cost of customization, I dunno…I’m winging it here. Thanks
Hello , yes would you add some clarity to Adams request plz , I’m doing a parts run down too
I’m going to go through this whole article and update it today.
Love the video, but the Store bought Glock was a full $200 cheaper than your build.. I wish there was a way to make Canik, Sig, or S&W. I like Glock, but I have other handguns that IMO are just better. Thanks again for the great content!
Sig p320 80 percent with genuine sig parts or poly80 lower also u can use S&w parts on poly80
Hey Ryan, I’m really excited about this because I enjoy building things and figuring out problems. I’ve never completed a build like this and want to make sure that I should align everything with the same model. I clicked on the frame link which goes to a model 19 where you can decide 9mm or .40 and then when I click the RMR slide it went to a model 17. The trigger link went to .357/40. The magazine went to 9mm. Are the links you provided to give a general idea and then we have to decipher whether we want to build something different? I don’t know whether the slide for a 17 will fit a frame for a 19 and in reading the Zev Tech trigger kit, the Q&A area listed a different part number for a 9mm. I’d like to order these items once and make sure to build them correctly. Any advice would be great! For clarity, I was following the links in the “Ryan’s Build” since the other lists may work differently. Thanks man!
Great over view thank you for your efforts! Couple of suggestions for your consideration: (1) under the section about optics – I would consider adding Holosun as an option the Holosun is very highly rated at about half the price of the Trijicon RMR (2) How to videos – Brownells puts out some fairly decent high-Level videos. My suggestion for super -detailed excellent quality how to videos I would recommend pointing readers to Marine Gun Builders channel. His videos are excellent and crazy minutely detailed how-to instructions.
In my experience Holosun are absolute junk. Maybe I don’t have enough experience with them?
Great guide! Thanks Ryan. I used this to build a Glock 22. I will say there are better options than Brownell’s out there. Was able to do complete build for $650.
I built my non glock, glock, for $360 seems like you could have done better
I would like to build my own Glock, but not for 1300 bucks..
Hi Rea.
How are you doing today? Where did you go to buy your glock that you build for so cheap? Joh you really did save allot and how’s the recoil on it and tje the hole gun? Thanks enjoy your day
Question: why does a metric threaded barrel allow for better silencer mounts? What is the specific advantage over imperial thread?
Great question – it’s not the thread-rate per se. Instead, it’s the specs for the different thread systems. The metric plans call for a better shoulder/stop for the silencer as part of the drawings whereas the imperial is just a thread rate without any specific should specs. Also, I’ve noticed a left-hand thread helps keep my silencer on with a right hand twist (most rifling).
Correction – not LE
Yeah, no way I’m shelling out a grand to build a Glock myself when I can get a new one for around $400. This is simply a work around for those that can’t pass a background check.
No. Some people enjoy building things themselves. Take a car enthusiast for example, they easily can spend way more fixing up or building a car on their own than they could buy one brand new. It’s not because they’re criminals, it’s because it can be fun to build something yourself exactly the way you want it (if you’re capable).
If you live in MA and are LE, you have 2 options. Buy used for a stupid amount of money or build.
[…] How to build a Glock? Learn how on Gun University […]
Why are these so expensive? I’m looking to build/buy a Glock for $200 or less – surely this must be possible, if not easy?
I’m willing to use parts that don’t look new, to clean off rust/gunk, file, whatever – I just don’t have much money to spend on it.
Get a Hipoint Yeet cannon g1 for $170, you will not be able to get a working glock for $200, just simply not possible.
Everything you need to know about building a 80% build, awesome thanks.
This is a great ‘how-to ..’ and easy to follow description with nice documentation for building a Glock at home without a serial number or registration.
Its asshats like you who think making a expose`is cooll to seem educated in some niche thing, all you have done is exposed this shit to idiot Americans and their tyrannical authority that will most vigorously attack small arm manufacturers of these kits….just like thewar on drugs in the 80s..now it’s will be a war on cights and freedoms of defending ones persons family or constitution.
Wake up people we are dying at an amazing rate and none of it is gun violence, but putting this shit online with the natrative”homemade” gun just scares people and disinforms the rest I to thinking it really is that easy, the facts are this:
To build a fire arm takes mechanical prowess and patience
2nd ask yourself this……. do you even need a fuc`n pistol? Chances are your just gonna shoot your spouse or her lover nextdoor when you come home early for so,e afternoon delight.
Lastley….the media is gonna destroy the I integrity of major gun manufacturers over this type of bullshit. No registered guns will never happen , but snubbing the atf and the feds with “LOOP HOLE” TACTICS IS GOING TO BRIMG THEIR BAN HAMMER DOWN WITH FORCE
You seem fun.
Great list and tips – please advise on if/how you installed channel liner and parts used
Glad you liked it! I installed the channel liner (it was white from the Lone Wolf kit) with a large roll-pin punch. The roll-pin punch was the right diameter and the middle “nipple” seemed like it would help keep the channel liner from collapsing in on itself. It worked. :)
Hey Ryan, been reading some of your articles.. almost none of the parts in your home glock build are available at brownells and some are flat discontinued… I think it’s time you remade this list, its gotta be 3 years old and with the virus, people have the time and inclination because guns are sold out.
Thanks for the heads up! Fixing it now.